Telecommuting Tips and Products We Love
News
Tips
Overview
The Virtual Background feature allows you to display an image or video as your background during a Zoom Meeting. This feature works best with a physical green screen and uniform lighting to allow Zoom to detect the difference between you and your background. You can upload your own images or videos as a virtual background. You can also use Virtual Background in a Zoom Room.
This article covers:
- Recommended setup
- Enabling Virtual Background
- Admin management of virtual backgrounds
- Using Virtual Background
- Enabling Virtual Background during a meeting
- Troubleshooting
Prerequisites
Make sure your computer meets the system requirements for Virtual Background.
Recommended setup
- To achieve the best virtual background effect, Zoom recommends using a solid color background, preferably green. Recommended physical green screens from Webaround or Amazon.
- Higher quality cameras result in a better virtual background. See camera recommendations for details.
- Use uniform lighting and color.
- Do not wear clothing that is the same color as the virtual background.
Background image
- There are no size restrictions when adding your own virtual backgrounds, but we recommend cropping the image to match the aspect ratio of your camera before uploading it.
Example: If your camera is set to 16:9, an image of 1280 by 720 pixels or 1920 by 1080 pixels would work well. - If you're not sure about your camera aspect ratio, use a background image with a minimum resolution of 1280 by 720 pixels.
- Browse some of the virtual backgrounds Zoom has collected, or use these sources for other royalty-free images: Pexels, Unsplash, Pixabay.
Background video
- A video (MP4 or MOV file) with a minimum resolution of 480 by 360 pixels (360p) and a maximum resolution of 1920 by 1080 pixels (1080p).
Enabling Virtual Background
Note: Users must sign out of the Zoom Desktop Client and sign back in for Virtual Backgrounds to take effect.
Account
To enable the Virtual Background feature for all users in the account:
- Sign in to the Zoom web portal as an administrator with permission to edit account settings.
- In the navigation menu, click Account Management then Account Settings.
- In the Meeting tab, navigate to the Virtual Background option (under the In Meeting (Advanced) section) and verify that the setting is enabled.
Note: If the setting is disabled, click the toggle to enable it. If a verification dialog displays, choose Turn On to verify the change.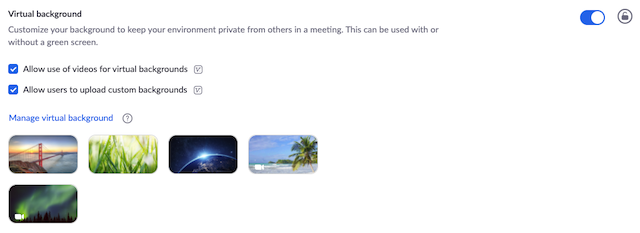
- (Optional) If you want to make this setting mandatory for all users in your account, click the lock icon, and then click Lock to confirm the setting.
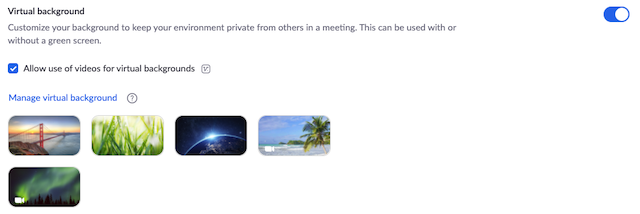
- (Optional) Check Allow use of videos for virtual backgrounds then Save to confirm the change, to grant your users access to video virtual backgrounds.
- (Optional) Check Allow users to upload custom backgrounds then Save to confirm the change, to grant your users access to upload their own virtual backgrounds in addition to the backgrounds currently uploaded.
- (Optional) Click Manage virtual background to upload default background images available for users.
Note: Users must have client/app version 5.1.1 or higher to see the background images you upload.
Group
To enable the Virtual Background feature for all members of a specific group:
- Sign in to the Zoom web portal as an administrator with permission to edit user groups.
- In the navigation menu, click User Management then Group Management.
- Click the name of the group, then click the Meeting tab to access Settings.
- In the Meeting tab, navigate to the Virtual Background option and verify that the setting is enabled.
Notes:- If the setting is disabled, click the Status toggle to enable it. If a verification dialog displays, choose Turn On to verify the change.
- If the setting is grayed out, it has been locked at the Account level, and needs to be changed at that level.
- (Optional) If you want to make this setting mandatory for all users in this group, click the lock icon, and then click Lock to confirm the setting.
- (Optional) Check Allow use of videos for virtual backgrounds then Save to confirm the change, to grant your users access to video virtual backgrounds.
- (Optional) Check Allow users to upload custom backgrounds then Save to confirm the change, to grant your users access to upload their own virtual backgrounds in addition to the backgrounds currently uploaded.
- (Optional) Click Manage virtual background to upload default background images available for users.
Note: Users must have client/app version 5.1.1 or higher to see the background images you upload.
User
To enable the Virtual Background feature for your own use:
- Sign in to the Zoom web portal.
- In the navigation menu, click Settings.
- In the Meeting tab, navigate to the Virtual Background option (under the In Meeting (Advanced) section) and verify that the setting is enabled.
Notes:- If the setting is disabled, click the status toggle to enable it. If a verification dialog displays, choose Turn On to verify the change.
- If the option is grayed out, it has been locked at either the group or account level, and you will need to contact your Zoom administrator.
Admin management of virtual backgrounds
Admins can upload their own virtual backgrounds for all users on their account to use, or can assign certain virtual backgrounds for use by specific user groups. The admin can allow users to add their own virtual backgrounds or restrict them to just what admins have provided.
- Enable the virtual background feature in Account Settings or Group Settings.
- Click Manage virtual background.
- Click Choose Files or drag and drop the images you want to upload.
- Wait for the upload to finish before closing this window. A small banner will appear along the top of the page when the upload is successful.
After the new backgrounds are uploaded, users will need to sign-out of the client and then back in to retrieve the backgrounds from the web.
Notes:
- Users must be on version 5.1.1 or higher to utilize this feature.
- The default Zoom virtual backgrounds cannot be removed from the web portal.
- Video virtual backgrounds cannot be uploaded at this time.
Using Virtual Background
 Windows |
  macOS
macOS- Sign in to the Zoom desktop client.
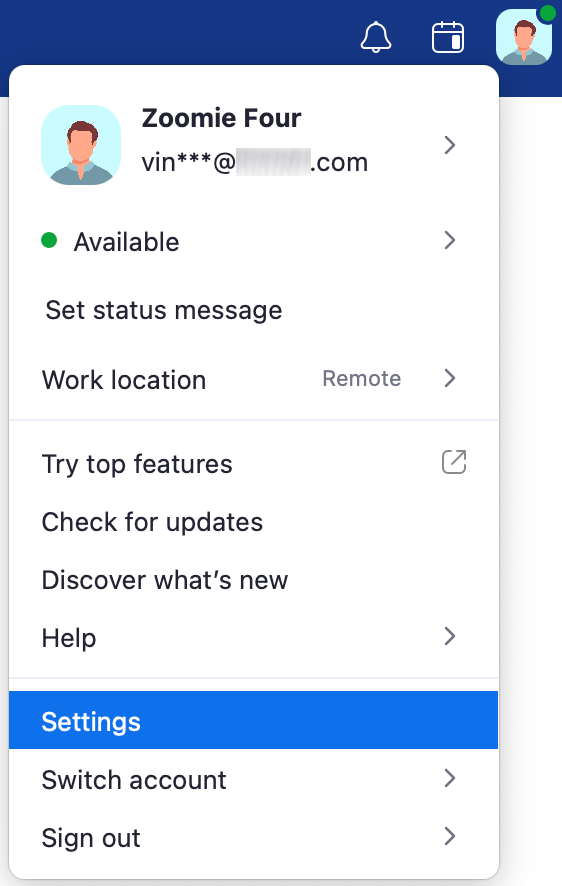
- Click your profile picture, then click Settings.
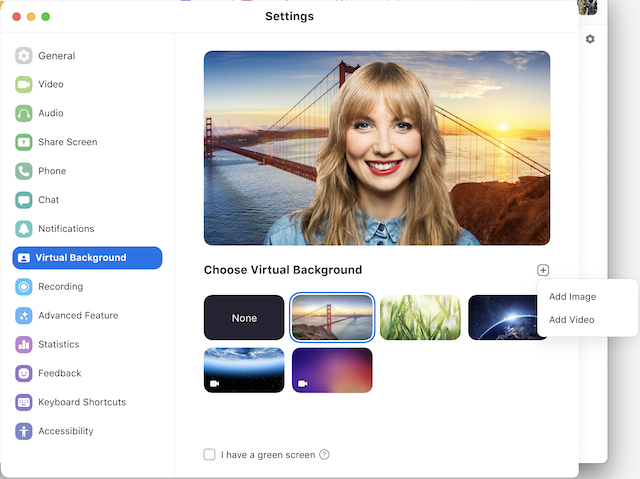
- Select Virtual Background.
Note: If you do not have the Virtual Background tab and you have enabled it on the web portal, sign out of the Zoom Desktop Client and sign in again.
- Check I have a green screen if you have a physical green screen set up. You can then click on your video to select the correct color for the green screen.
- Click on an image to select the desired virtual background or add your own image by clicking + and choosing if you want to upload an image or a video.
If prompted, click Download to download the package for virtual background without a green screen.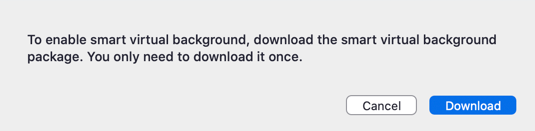
Notes:- Ensure that you are using a solid background color.
- After you select an option, that virtual background will display during your meetings.
- To disable Virtual Background, choose the option None.
 Linux
Linux Android |
 Enabling Virtual Background during a meeting
If you have already have Virtual Background enabled in the web portal, you can turn it on during a meeting.
Zoom Desktop Client
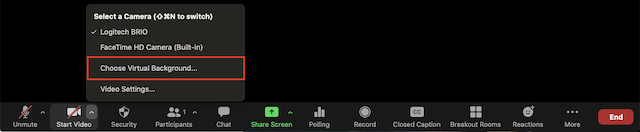
- In a Zoom meeting, click the upward arrow (^) next to Start/Stop Video.
- Click Choose Virtual Background....
 .
. - If prompted, click Download to download the package for virtual background without a green screen.
Troubleshooting
If you are experiencing issues with Virtual Background, try the following troubleshooting tips:
- If you do not have the Virtual Background tab in your desktop client settings after enabling it, sign out of the client and sign in again.
- Manually pick the background color to ensure the correct color is selected. This option is only available after you click an image.
- Ensure that the background is a solid color with minimal shadows. Also ensure the background is uniform in lighting. A 3-point lighting setup is ideal.
- Ensure that your green screen color does not match your shirt, hair, or eye color.
If you continue to experience issues, contact Zoom Technical Support.
Telecommuting Products
 Artificial Intelligence | COVID Center of Excellence | Cyber Fraud Prevention | Education & Study Abroad| Executive Women's Network | Covid Employment Task A-Z | Covid Jobs Taskforce |Global CyberFraud Prevention | Global Education Study Abroad| Healthcare COE | HDI | itSMFSFBay | Jobs/Careers FB | LI | Recruiters Network |Knowledge Centered Services | Vouch4Veterans


Thanks for coming and will connect you soon!
ReplyDeleteRemote Part Time Jobs Ireland